
Plex Media Server stands out as a robust app that lets you sort and send your personal stash of media—think films series, tunes, and snapshots—to different gadgets creating one spot for all your fun stuff. This guide’s gonna show you the ropes on grabbing, putting in place, and getting Plex Media Server all ready to go on a Windows machine so everything runs smooth as silk.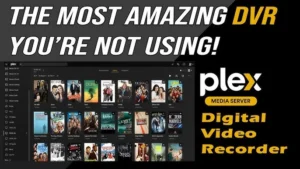
System Specs
Before you jump in, make sure your machine ticks these boxes:
- Operating System: You need Windows 10 or something newer, and make sure it’s the 64-bit kind.
- Processor: You’ve gotta have at least a modern CPU, like an Intel Core i3 or something that’s just as good.
- Memory: You’re gonna need at least 2 GB of RAM, but hey, if you can go for 4 GB, it’s way better.
- Storage: Make sure there’s enough room for the Plex Media Server app and all your cool media stuff.
- Internet Connection: Yeah, you’ll need this for when you first set it up and to pull in all the fancy metadata.
Getting Plex Media Server on Your Machine
- Getting to the Download Spot: Fire up the web browser you like best and head over to the Plex Media Server Downloads spot.
- Choosing for Windows: When you’re on the downloads page, spot the dropdown where you pick your platform and hit “Windows” so you grab the right version.
- Start the Download: Smack that “Download” button and get the installation stuff downloading onto your computer.
Slapping Plex Media Server onto Windows
- Starting the Install: After the download finishes, go find the installer file. It’s called PlexMediaServer-<version-number>.exe in your Downloads. Give it a double-click to kick things off.
- User Account Control Heads-Up: If this User Account Control thing pops up asking permission, hit “Yes” so the installer can do its stuff on your computer.
- The Setup Journey Begins: You’ll see the Plex Media Server Setup Wizard show up.
- Picking Where It Lives: You get to pick where to put Plex Media Server. Most people stick with the spot it suggests, but go ahead and pick a new place if you feel like it.
- Start Plex: After you set it up, make sure to pick the “Launch Plex Media Server” before you hit “Finish.”
Initial Configuration and Setup
When setting up your device for the first time, you’ll need to input your preferred settings. This step gets your device ready to use with its basic capabilities. Tailoring these preferences ensures that the device operates according to your needs right out of the box.
Next, installing essential software is a must-do. These applications give your device the extra functionality needed for tasks you plan to do. Whether it’s for work, study, or play, the right software makes a huge difference.
Also, remember to create a backup plan for your data. It’s the safety net you’ll be thankful for if things go sideways. Safeguarding your information means you’ll have less to worry about if your device encounters any trouble.
In short, these actions set the groundwork for a smooth-running device. They’re not the most exciting part of getting a new gadget, but trust me, they’re worth it.
- Logging Into Plex Account: Fire up Plex Media Server, and it’ll swing open a fresh browser window that takes you straight to the Plex login screen.
- Folks Who’ve Been Here Before: Go ahead and type your info to get back in.
- First-timers: Hit “Sign Up” and get yourself set up with a new account.
- Picking a Server Name: Once you’re logged in, you’re gonna need to give your server a name. Make it something that stands out, ’cause it’ll help a bunch if you’re dialing in from afar or juggling more than one server.
- Setting Up Your Media Libraries: Plex is gonna walk you through hooking up your media libraries.
- Adding a Library: Just tap on “Add Library” and choose the kind of stuff you wanna add, like Movies, TV Shows, Tunes, or Snaps.
- Choose Directories: Hunt through your computer and pick out the directories that hold your media files.
- Refreshing Your Collection: After you set things up, Plex goes on a mission to sift through those directories you pointed out, make a list of your tunes and shows, and grab cool stuff like cover pictures, blurbs, and stars.
Getting Hold of Plex Media Server and Making It Work
Okay so to kick things off, you gotta snag Plex Media Server, which is pretty much like your at-home Netflix. Once you get it, you’ll make it do its thing by setting it up to keep all your movies, shows, and tunes in one spot. Super easy to reach, all organized, and up to you to make it cool.
- Web Interface: Take charge of your server and media via the Plex Web App.
- Features: This is where you get to sort your media tweak server settings and stream your shows and movies.
- Client Applications: Plex hooks you up with apps for all sorts of devices to make your streaming experience super smooth.
- Download Apps: Need apps for your gadgets, like phones, tablets, TVs that are smart, and gadgets that stream? Just hit up the Plex Downloads spot to grab ’em.
- Sign In: Got the app on your device? Sweet! Just sign in with your Plex details to dive into your media collection.
Tweaking Your Plex Fun
- Go Premium with Plex Pass: Think about getting a Plex Pass for the cool extras.
- Cool Stuff You Get: You can have things like syncing for when you’re out live TV, recording shows better music collections, and a sneak peek at upcoming stuff.
Wrapping It Up
When you install Plex Media Server on a Windows machine, your PC turns into a multi-tasking media center. It lets you send your own media stash to all kinds of devices with no sweat. Just stick to this guide, and you’ll get to kick back with an awesome, neat, and easy-to-get-to media setup that fits what you like.